Installation
The Raspberry Pi original os image should be downloaded and then written to Raspberry Pi.
Notice
Raspberry Pi 4B supports only SD Card boot options.
But, the CM4 module has 2 boot options an onboard EMMC and an SD Card boot option.
if you have one with onboard eMMC then you can't use the SDCARD slot.
Please refer writing guide according to your board type.
-
If you have SD Card Boot type, Please refer section 1.1, 1.3 and 2.1.
-
If you have EMMC Boot type, Please refer section 1.2, 1.3 and 2.2.
1. Download
1.1. Download SD Writing Tools
-
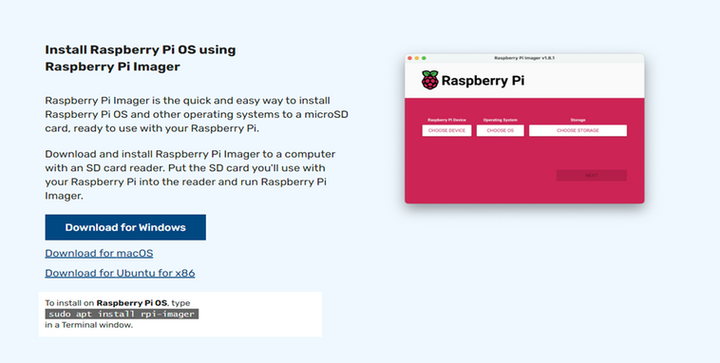
Browse to https://www.raspberrypi.com/software/ , then download the Raspberry Pi Imager, according to the Host OS, and install it.
1.2. Download EMMC Writing Tools
-
Browse to https://github.com/raspberrypi/usbboot/raw/master/win32/rpiboot_setup.exe , then download the rpiboot_setup.exe, and install it.
-
Browse to https://win32diskimager.org/, then download the win32diskimager, and install it.
-
Needs to USB Type-C cable for writing.

1.3. Image Download
-
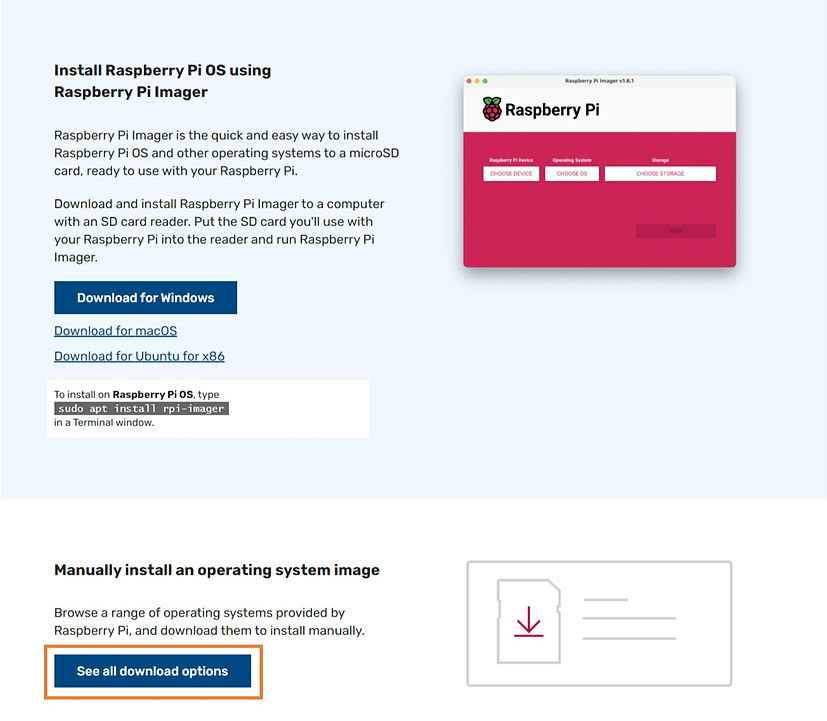
Then download the Raspberry Pi OS, go to "See all download options"
-
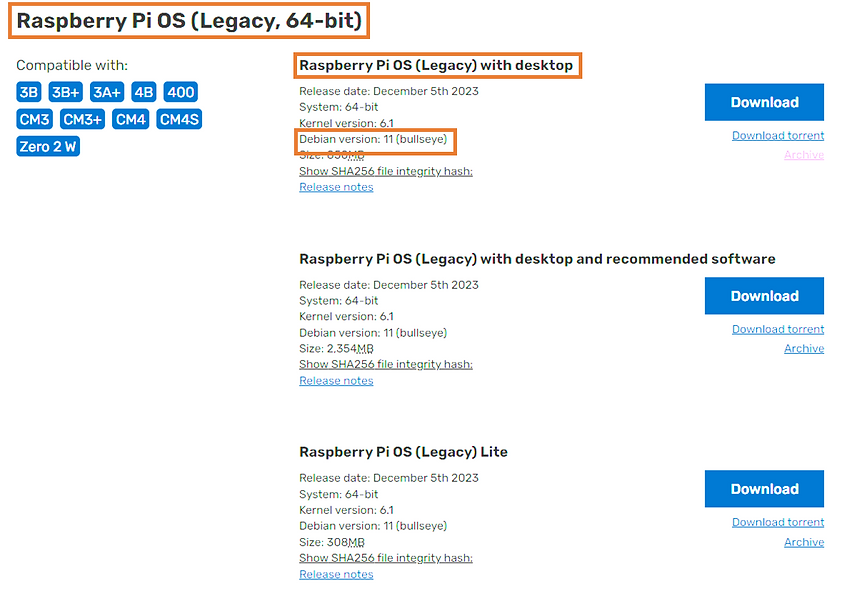
Dwonload image "Debian Version 11(bullseye)" of “Raspberry Pi OS(Legacy) with desktop”, “Raspberry Pi OS (Legacy, 64-bit)
2. Write
2.1. SD Card Writing
-
Attach the Micro SD Card to the USB to microSD Writer and then inset it to the PC. (USB 3.0 is recommended)
-
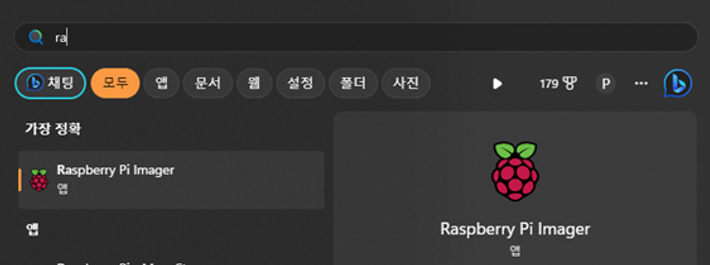
Execute the installed Raspberry Pi Imager.
-
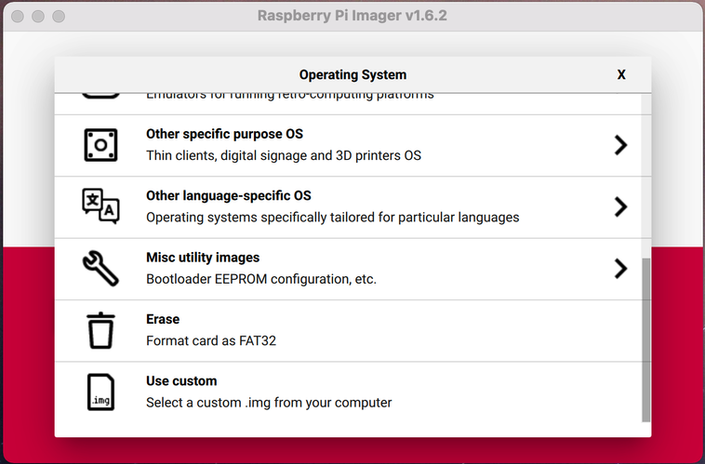
On the executed Raspberry Pi Imager click "Choose OS".

-
Choose "Use custom".
-
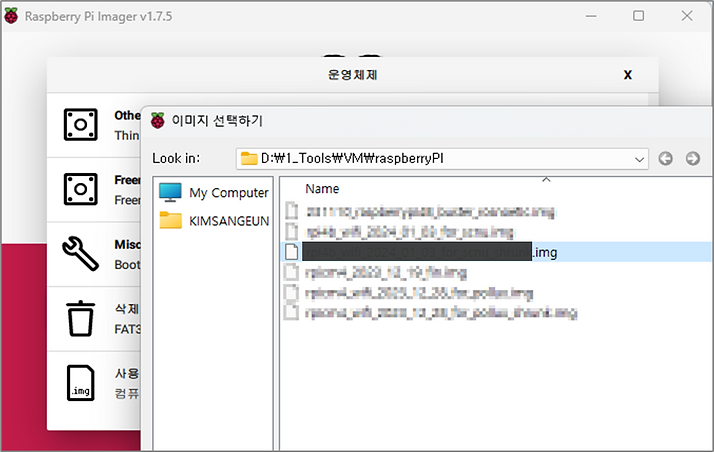
Select a downloaded image.
-
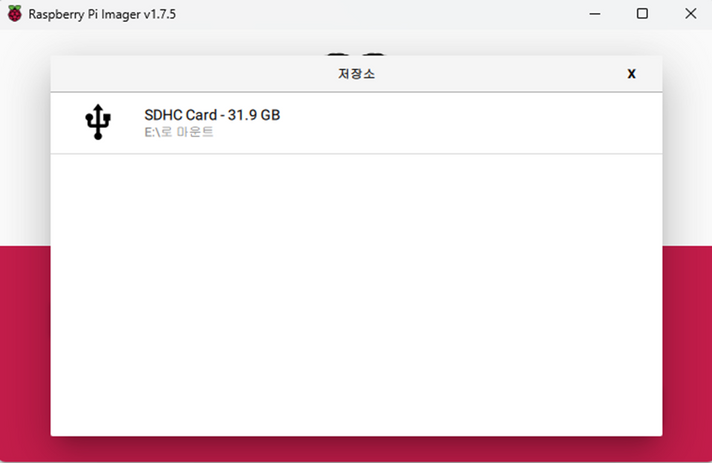
Now click "Choose SD Card"

-
Click on the attached SD card.
-
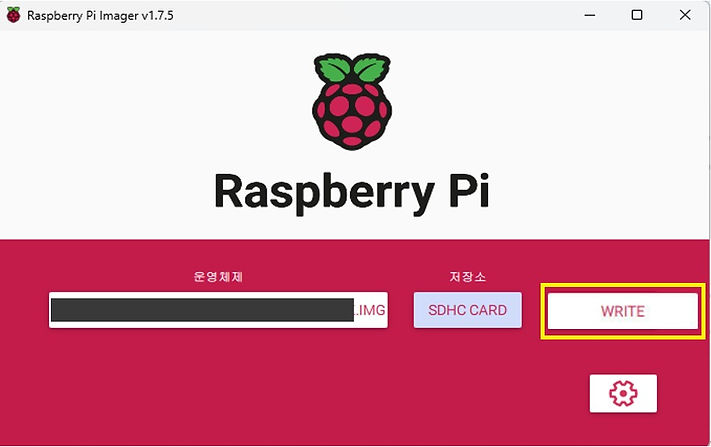
Click on "Write". (if a warning message appears proceed by clicking "Yes")
-
The writing and confirmation process might differ according to the SD Card Writer, Using USB3.0 it takes about 5 minutes.
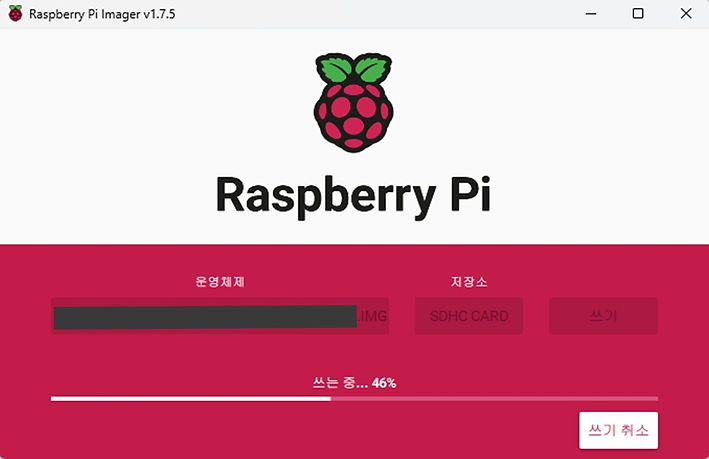
-
Complete

-
After completion insert the micro SD card to the Raspberry Pi.
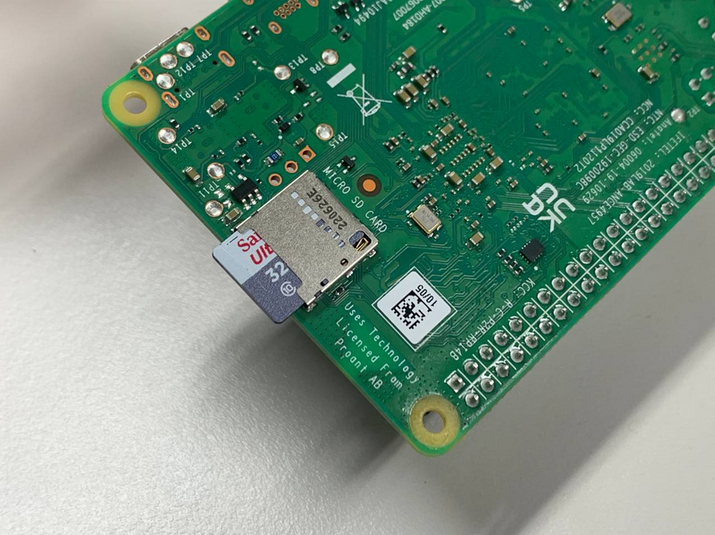
2.2. EMMC Writing
-
Execute the installed rpiboot_setup.exe
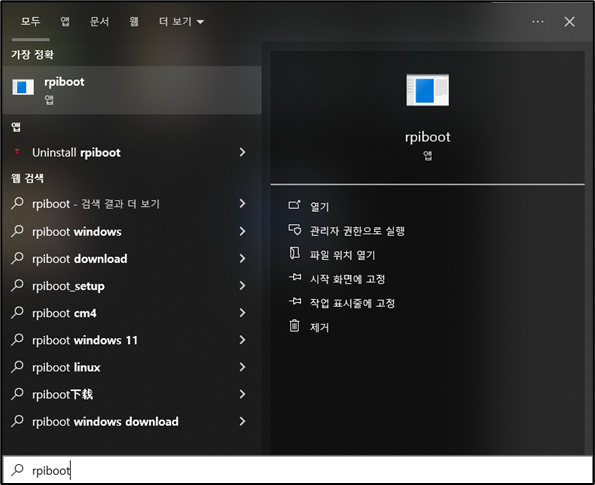
-
Running rpiboot
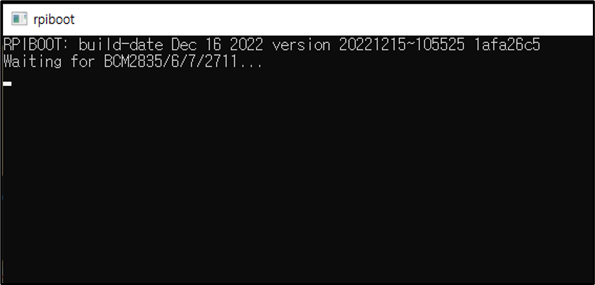
-
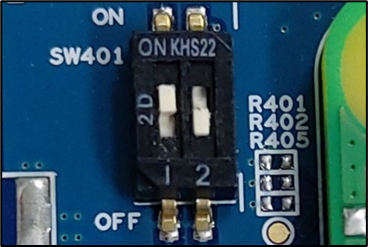
Change to EMMC write mode (SW401 => 1-ON, 2-OFF)
-
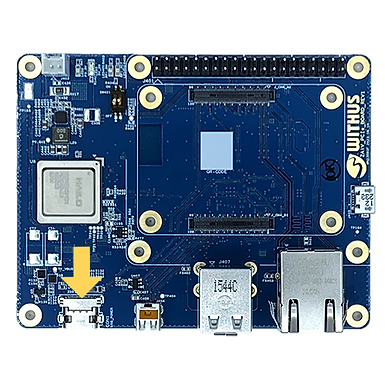
Connect Type-C cable from PC to ZAiV-AHP Boaard.
-
Raspberry PI be recognized as a removable disk.

-
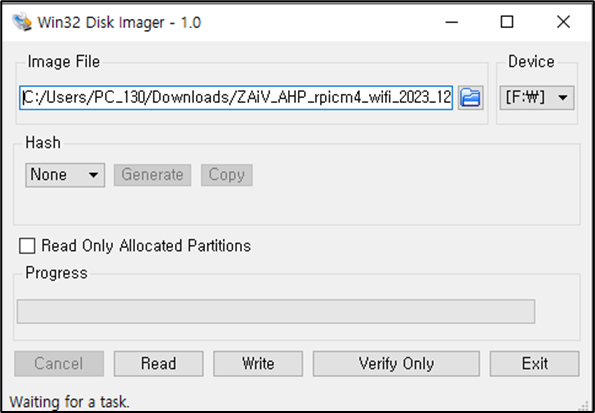
Run Win32DiskImager
-
Set "image File" Section, select download image.
-
Set "Device" Section, select a drive.
-
Click "Write" Button.
-
-
If writing completed, remove cables.
-
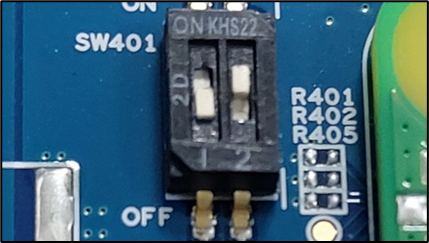
Change mode to boot mode (SW401 => 1-OFF, 2-ON)
-
Insert power cable for boot.
